The bare minimum highlights:
1) Download the source code. Circa January 2014, I used ArduCopter-MPNG V3.0.1 R2.
2) You need a special version of the Arduino environment. I used this one.
3) There is a step where you replace the Arduino environment's "pde.jar" with the one that comes with the MegaPirateNG source code. Do not skip this step. Make sure to do it with the Arduino IDE closed.
4) Open "ArduCopter.pde" in the Arduino IDE.
5) If you use the Hobby King V2 Flight Controller like I did, you need to modify the firmware, as this board does not use Pulse Position Modulation (PPM), but used Pulse Width Modulation (PWM) instead. The change to the firmware is minor, and shown below. Dig in and find the file ardupilot-mpng\libraries\AP_HAL_MPNG\RCInput_MPNG.cpp and modify it as shown in the pictures below. Red text is removed, and green text is added.
This is what the firmware looks like before the change:

This is what the firmware should look like after you have made the change to use PWM.

6) Install the Virtual COM Port (VCP) version of the FTDI driver. There are other versions, so check this page if you're not using Windows 7 64-bit like I am.
7) Hook up your Flight Controller via USB. Windows should recognize it and you should get some red blinking lights on the Flight Controller board.
8) Choose the proper serial port. Mine was COM3. Yours may be different.

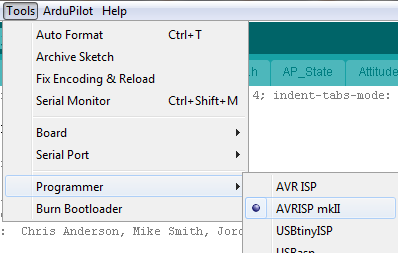
9) Choose the proper programmer. AVRISP mkII worked for me.
10) Choose the proper target board. My Flight Controller has an ATMega 2560 onboard.

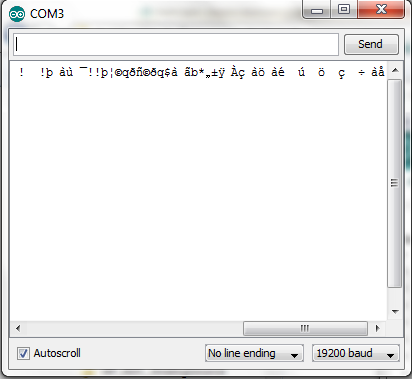
11) If you open the Serial Monitor under Tools, you should see some output coming from the board every second or so. Don't worry that it looks like gibberish at the moment. (We'll talk about that gibberish more next time.) See picture below.
12) Compile
To start the compilation:

Compiling:

Done Compiling:

13) Upload. Push this button while connected to upload. Be patient; it's a big sketch.

14 When the upload successfully completes, you should be able to open Mission Planner and connect. This is a tremendously awesome free GUI for configuring, controlling, and monitoring your quadcopter. We will get more in to this next time, but for you overachievers out there, feel free to go ahead.. You should be able to see all sorts of cool output from your connected flight controller. We're almost ready to arm and spin the motors.